
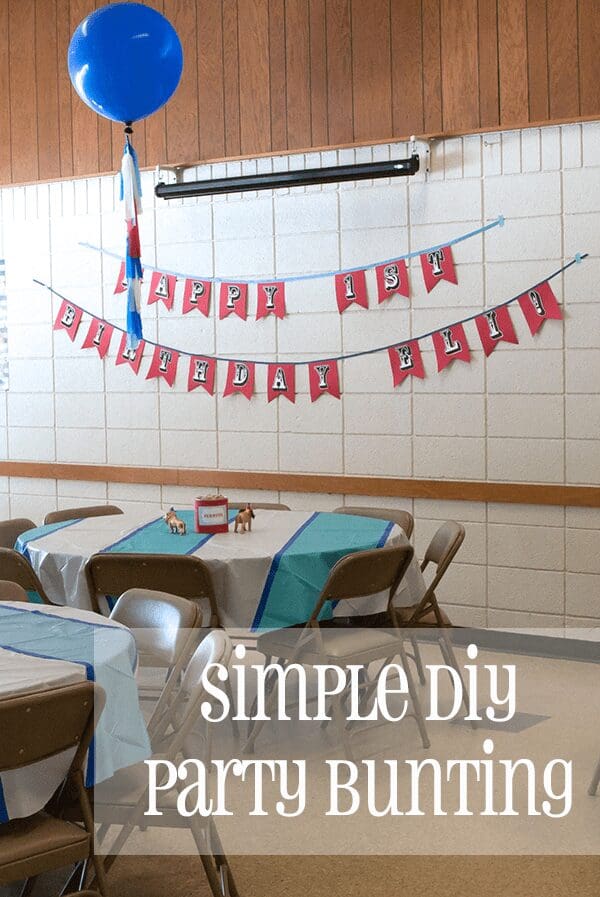
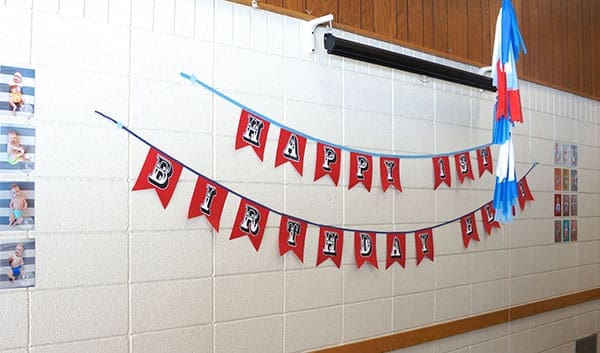
Filling up a large blank wall for a party is not easy. Filling up a 30′ blank wall is even less easy. And for my son’s first birthday party, that’s exactly what I had to do. As I mentioned on TCMB previously, we rented out a local community center for my son’s party, which means it came with lots of white painted cinder block walls that needed to be filled on the cheap. Enter this DIY party bunting. It’s fast to put together, cheap (or if you’re a paper and ribbon hoarder like me – FREE), and not complicated to make. And I promise, no matter the size of your wall, this bunting will fill it quickly and easily and make a huge statement for your party.
Here’s what you need to do.
First, gather your supplies. Here’s what you’ll need:
- Ribbon
- Two colors of contrasting cardstock (I used red and white)
- Hot glue gun
- Scissors and/or a paper cutter
- Ruler
- Pencil
- Double stick tape
- Printer
How much paper and ribbon you’ll need will depend on the size of banner you want. Because I was trying to fill a 30′ wall, I made my two buntings 10′ long and 12′ long (measuring from the edge of the red paper on the left to the edge of the red paper on the right). So if your measurements differ, you might need to do a bit of math.
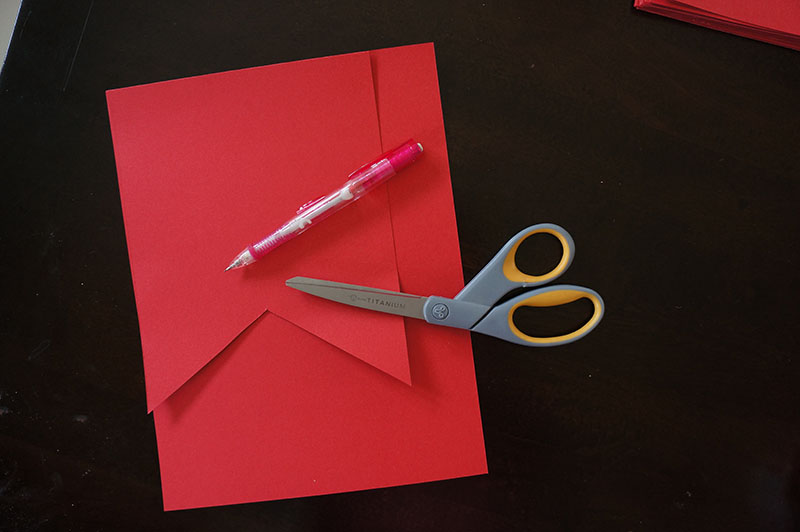
To cut out each flag, I first created a template so I didn’t need to measure each individual one. I did this by taking the red cardstock and cutting out a 6″x7″ rectangle. Next, I marked 2″ up from the bottom in the center. I then folded it in half and cut a diagonal line from the edge of the paper to the dot I made 2″ up. Ta da! A perfectly symmetrical flag.
From there, I could zip through making each bunting by tracing my template on the paper and cutting it out with scissors.
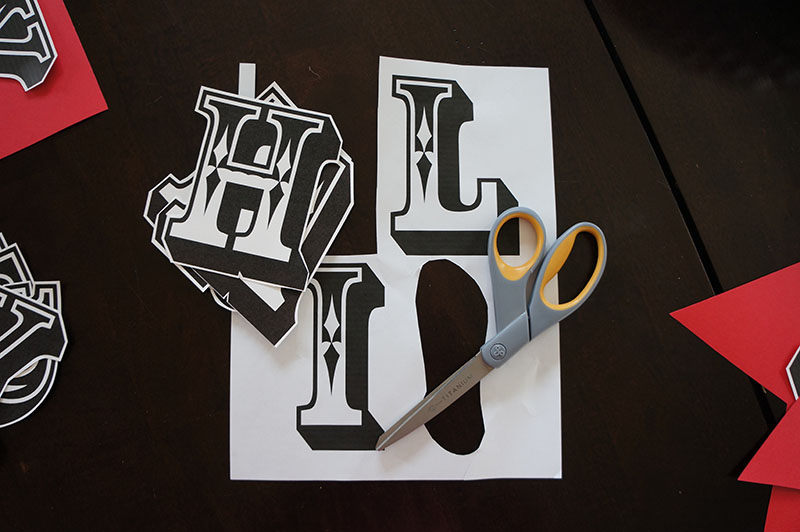
Next, print and cut out your letters. For mine, I used InDesign, but you can easily use Microsoft Word for this as well. Just make your page size 6″x7″ and depending on the font you choose, select a font size that fills the page. For reference, I chose Rosewood, which you can download for free here, and my font size was 412.
Once you have it set up how you like it, I recommend printing and cutting a test letter, just to make sure the scale is what you like. Also, don’t feel like you have to print out your letters, you can hand draw them or even purchase them too!
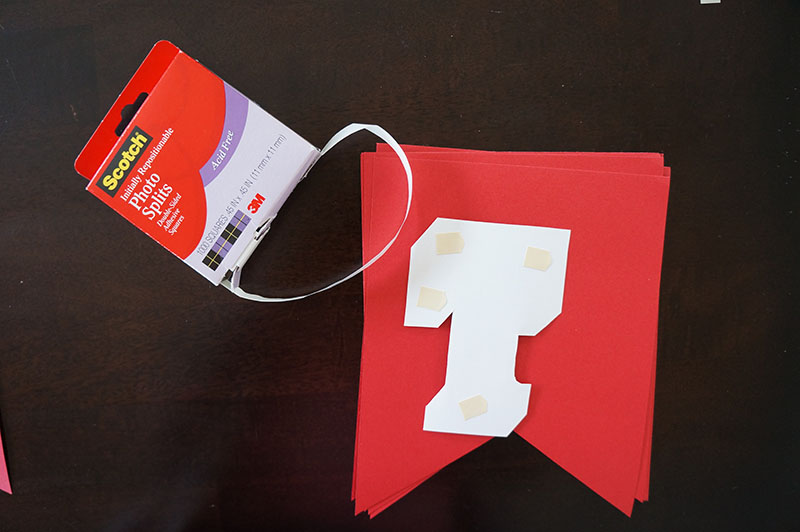
Once you have all your letters and flags cut out, use double stick tape (Or photo splits, the same thing – I was just using what I had.) to put the letters on the flags. I just eyeballed the center and stuck it on.
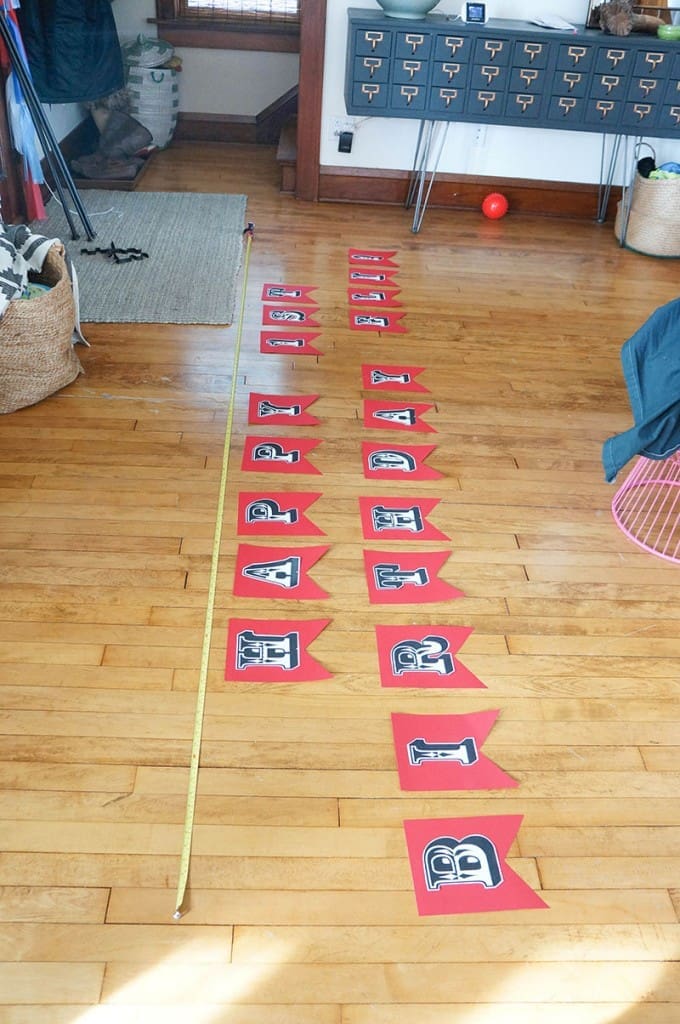
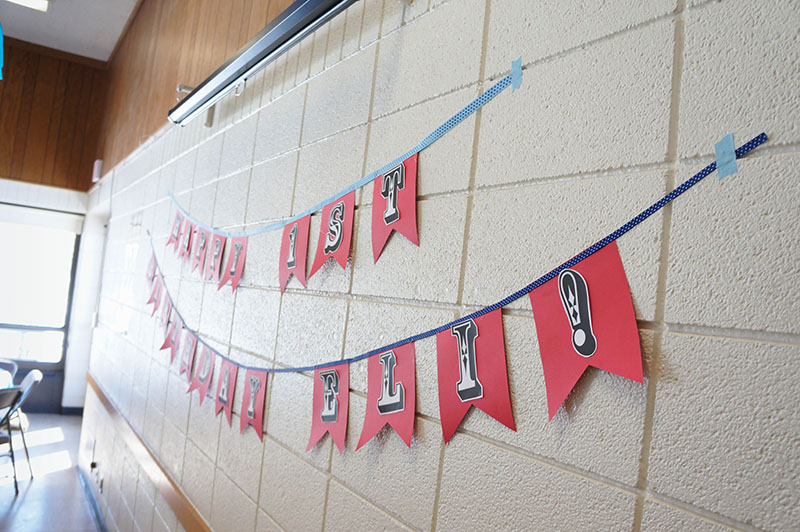
Once each flag is made, line them up on the floor in order with approximate spacing in between. I set my measuring tape to 12′ then lined up each of the flags with 2″ in between each flag, and about 9″ in between each word. (And I’m sorry for my extremely messy house!)
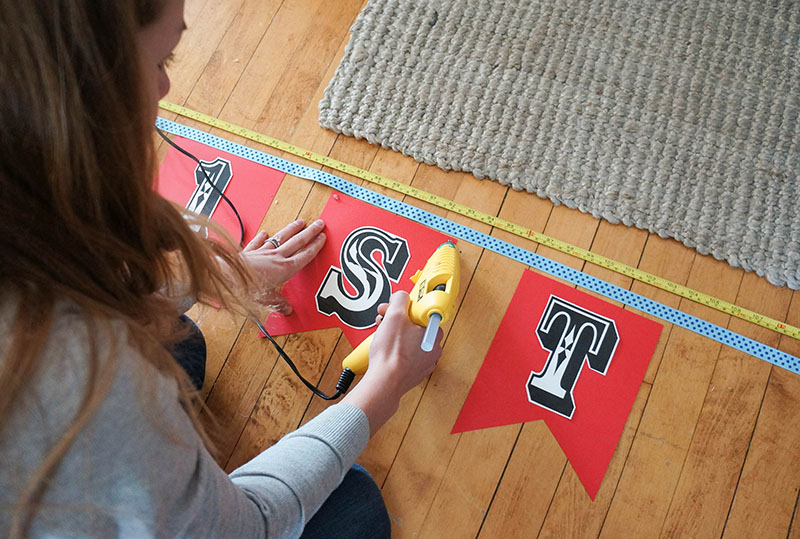
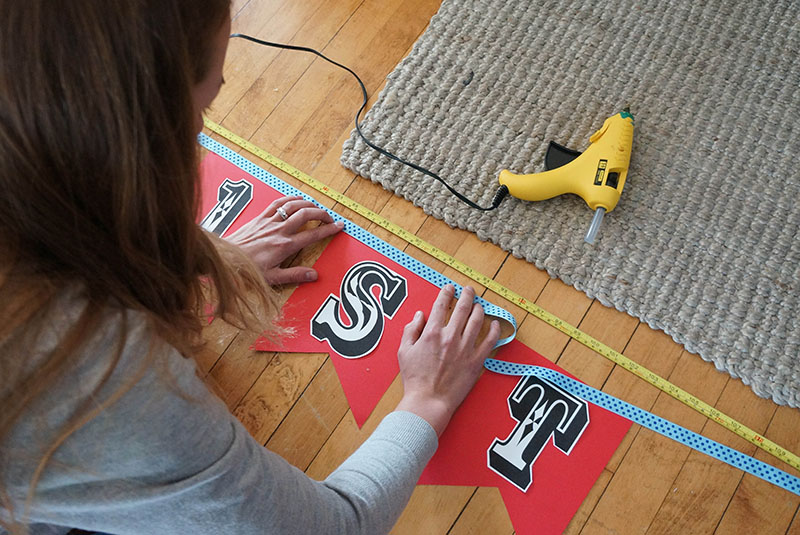
Next, hot glue your paper to the ribbon. I just threw two dots of glue on either corner. Since hot glue is so strong, it doesn’t take much. Just be sure you choose a thicker ribbon, so the hot glue doesn’t bleed through.
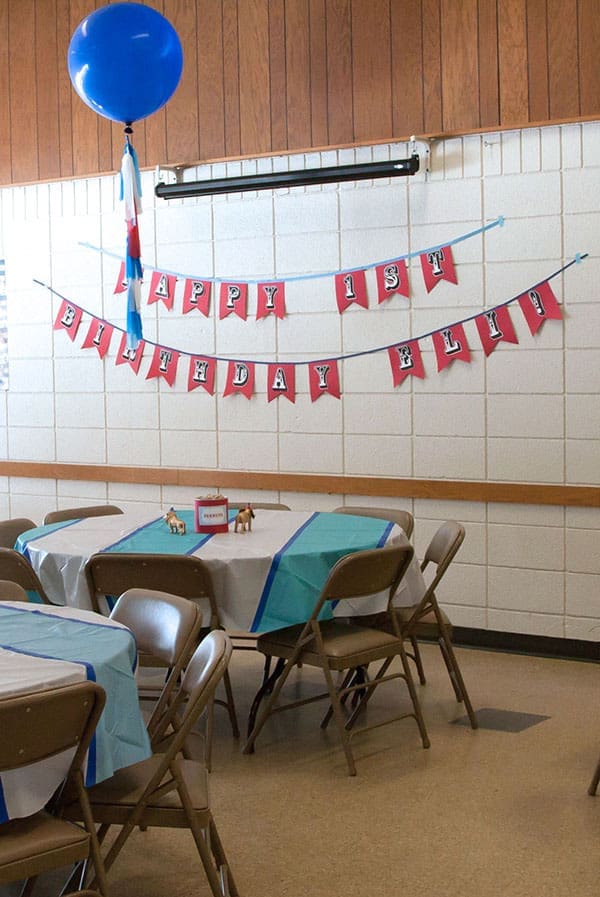
And then you’re done! All that’s left is to hang it on your huge wall! I used blue masking tape to tack it to the wall and it was plenty strong.
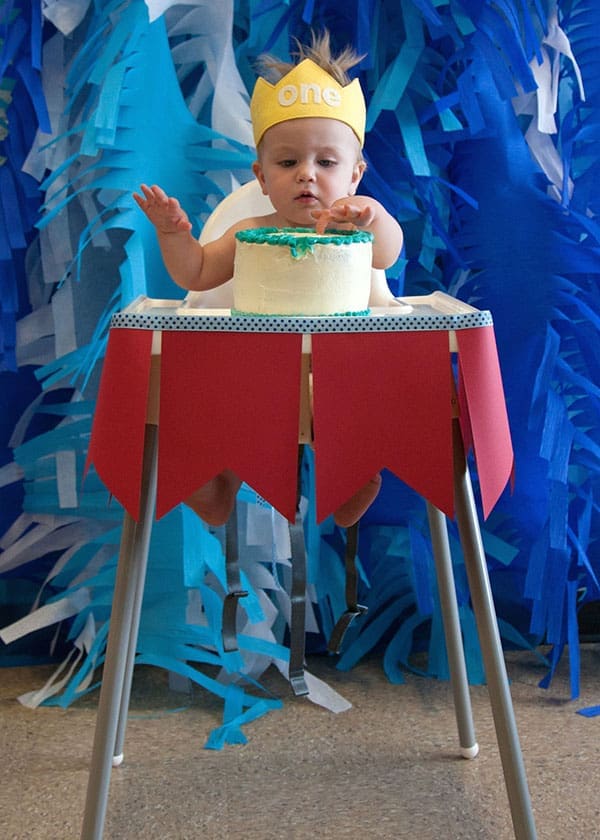
These buntings are so simple! Once you start making these, you’ll find tons of uses for them! I also made a shorter, blank one to wrap around my son’s high chair for the smash cake.
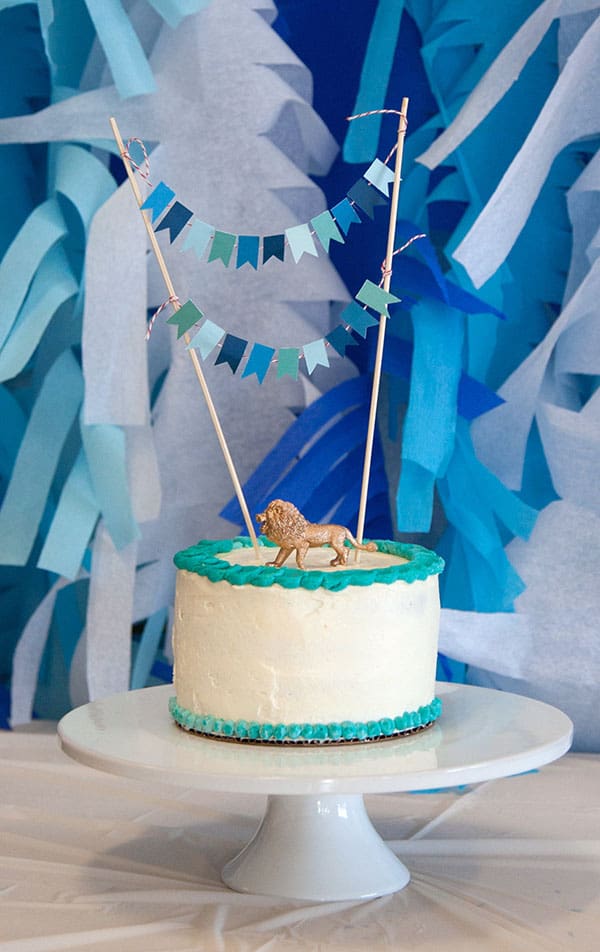
I love how versatile these buntings can be. Make it in any color, any size, and tons of different materials. Here’s a mini one I made for the smash cake, made from paper, skewers and bakers twine – the full tutorial and more info on the cake can be found here.
How about you? Have you made any fun party decorations lately?